

Some time ago I stumbled (again) over some stereo pictures. This time I had to build my own simple rig. I am not going in depth of the principles of stereo or 3D photography; there are many and very detailed web pages about this subject. I rather show a solution that practically everyone can build by her(him)self (At least with the help of a good friend).
In the last step you find a few pictures for 'cross-eyed' and 'parallel' viewing.
A little guide to 3D viewing you find HERE
A little guide to 3D viewing you find HERE

Find the Materials
Question was, how do I move my camera 2.5" or ~6.5cm in either direction. Somehow it has to slide to the left and right. Alright, you need a 'track' and you need a carrier for the camera.
I sifted through all the stuff in my basement and found this steel track, maybe once used for a sliding door. Also a nice piece of hardwood where a cutoff piece of this track would ride on.
 |
Cut the Track
The wood was 1" thick. With a bit of sanding it would fit nicely into the metal piece. I drew up a sketch and run over to my friend, an experience wood worker. A few cuts on the table-saw later I had a nice track my metal carrier could ride on.


Build the Camera Carrier
The mounting hole at the bottom of a camera is made to accept a 1/4" - 20 screw. Back in my basement I drilled a 1/4" hole in the middle of the metal piece, inserted a 1/2" long screw and secured it with a nut. There was enough thread sticking out to screw the camera on.


The Job Done
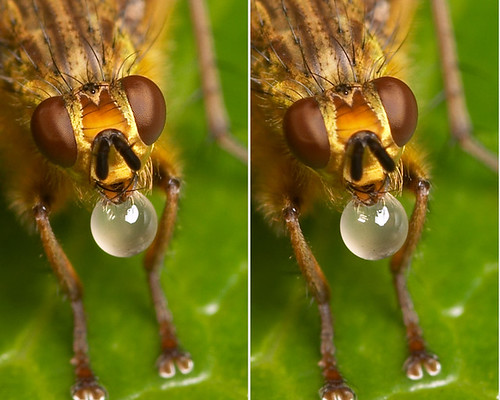
All in all it didn't take me longer than 2 hours and to be honest, the assembly was a bit wobbly first. I inserted some Styrene shims and now the whole contraption slides smoothly back and forth , or rather right (first picture) to left (second picture).
I hope at least some of you can enjoy my first stereo pictures I took this evening in my yard.
The first 5 pictures are for 'cross-eyed' viewing, the rest are for people who find it easier to use 'parallel' viewing.
I hope at least some of you can enjoy my first stereo pictures I took this evening in my yard.
The first 5 pictures are for 'cross-eyed' viewing, the rest are for people who find it easier to use 'parallel' viewing.
© 2005 Lord V

© 2006 JohnKit
About The Author
Share This


Subscribe Here


