Showing posts with label Photoshop. Show all posts

May 24, 2010

Professional Looking Motion/Blur Effect for Your Images


In this tutorial we’re going to show you how to create a very popular motion blur effect used in many magazine and various other professionally crafted images


1. Open your target image in photoshop, as always the greater the resolution of the image you’re working with, the greater it will demonstrate the effect.


2. First step is to create a copy of your layer, to do this simply drag your existing layer to the new layer button in the layers palette.

3. With our new layer selected, navigate to ‘Filter -> Blur -> Radial Blur’ on the main menu. In the ‘Radial Blur’ dialog, set your blur settings as follows. You can adjust the ‘Amount’ and ‘Quality’ settings as you wish, depending the effect you are going for. My example uses the following settings pictured here:


4. Our image should now look something like this:


5. Next, we’re going to take the eraser tool and use it to expose our subject beneath the blur. With our new layer selected simply use the eraser tool to remove the blur from our subject and expose our orginal layer below.
The brush size you use will depend on the size of your image, my brush settings are as pictured.
Eraser Tool Settings


6. Now we should really see our effect taking shape. I’ve erased away the blur from the my baseball player and left the radiating blur effect around him.


7. Finally, navigate to ‘Image -> Adjustments -> Levels’ on the main menu. Here we will adjust our color levels to further enhance the effect, again depending on the image you’re working on, your settings will most likely differ from mine however simply adjust the levels setting the by dragging the level indicators circled below until you’re happy with the effect. These are the settings I used:


8. Voila! Our finished effect. I’ve added some text which of course is totally up to you depending on the project you’re creating.

May 21, 2010

Create Silky Smooth Waterfalls


n this Adobe Photoshop tutorial, we're going to look at how to give waterfalls a silky smooth appearance, as if the photo was taken with a longer exposure which would normally require the use of a neutral density filter.
Here's the photo I'll be starting with:
The original image
And here's the finished "silky smooth" effect:
The final result

Let's get started.

Step 1: Draw A Selection Around The Waterfall

With your image open in Photoshop, grab your Lasso tool from the Tools palette:
Selecting the Lasso tool from Photoshop's Tools palette.
Select the Lasso tool from the Tools palette.
You can also press the letter L on your keyboard to quickly select it.
Then, with the Lasso tool selected, drag a selection around your waterfall. It doesn't have to be surgically precise, but try not to stray too far from the edges of the waterfall:
Using the Lasso tool to drag a selection around the waterfall.
Use the Lasso tool to drag a selection around the waterfall.
If you need help with making selections, check out our Unlock The Full Power Of Basic Selections tutorial.

Step 2: Copy the Selection Onto Its Own Layer

With the waterfall selected, use the keyboard shortcut Ctrl+J (Win) / Command+J (Mac) to copy it onto its own layer above the Background layer. You won't see anything happen in the Document Window, but if you look in the Layers palette, you'll see the waterfall on a new layer:
The waterfall is now on a new layer above the Background layer.
Press "Ctrl+J" (Win) / "Command+J" (Mac) to copy the waterfall onto a new layer.

Step 3: Apply The Motion Blur Filter To The New Layer

With our waterfall now copied to its own layer, we can create our "silky smooth" effect by applying the "Motion Blur" filter to it. To do that, go up to the Filter menu at the top of the screen, select Blur, and then select Motion Blur. This brings up the Motion Blur dialog box:
Photoshop's Motion Blur filter dialog box.
Photoshop's "Motion Blur" dialog box.
Adjust the Angle of the blur so it matches the angle at which the water is falling. In most cases, this would be 90°, since water would normally fall straight down. In my case, since the water is rushing so quickly over the edge, it's actually falling at a bit of an angle, so I've set my blur angle to -77°. The easiest way to match your blur angle to the water is to click inside the Angle value box and then increase or decrease the value one degree at a time using the up or down arrow keys on your keyboard, which is what I've done.
Once you've set the correct angle, drag the Distance slider at the bottom until your waterfall looks nice and silky. I've dragged mine to a value of 73 pixels, which gives me a nice effect.
Here's my image after applying the Motion Blur filter:
The image after applying the Motion Blur filter.
The image after applying Motion Blur.

May 16, 2010

Tilt-Shift Photography Photoshop Tutorial - Fake Minaturing

This tutorial has been produced using Photoshop CS2 on a PC.

Step 1: Photo Selection

When choosing a photograph for the tilt-shift effect, bear in mind that you want to give the impression of a miniature model. Miniature models are usually viewed from above so try and choose a photo with an elevated viewpoint. Buildings, roads, traffic and railways are excellent choices but make sure there is a reasonable wide angle of view.
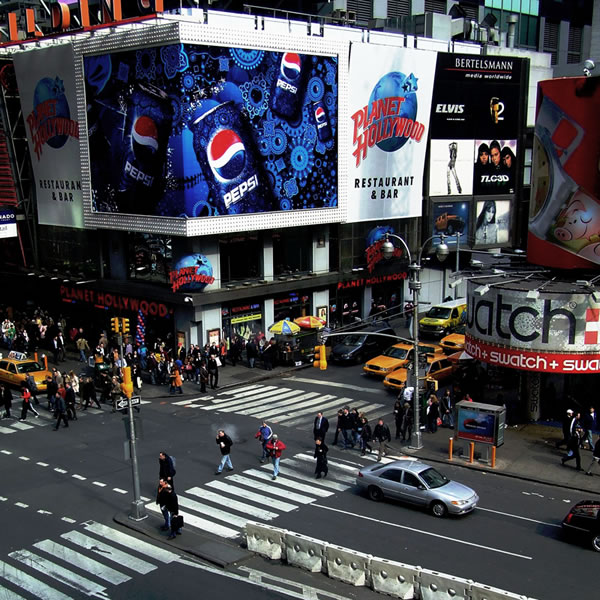
For this tilt-shift photography Photoshop tutorial, we are using a picture of Times Square during a typical day:
Step 1: Photo Selection
Even before the tilt-shift effect has been applied, it's not too hard to imagine the scene as if it were a model.
Tilt-Shift Photography isn't only for wide scale pictures; it is used to draw the focus to a certain area of the picture. Today online bingoand other online gaming sites use a similar method to draw the visitor’s attention to the part of the page where the game is set.
No matter what kind of picture you are looking for remember that what’s really key is the angle of the shoot.
To find an appropriate image, we suggest you browse through the flickr tilt-shift fakes pool. Pay attention to licensing terms though - if you are going to manipulate and display your work it will need to be released under the Creative Commons licence.

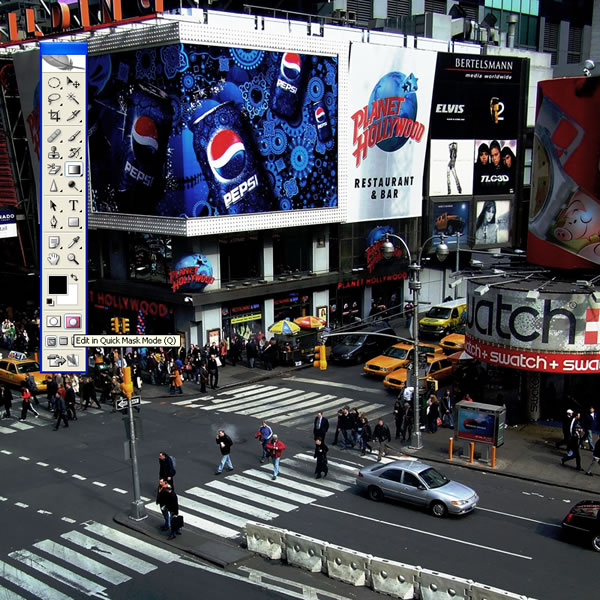
Step 2. Enter Quick Mask Mode

Open the image in Photoshop and enter Quick Mask Mode by pressing Q on the keyboard, or select the Quick Mask icon as shown in the Tool Palette below:
Step 2. Enter Quick Mask Mode

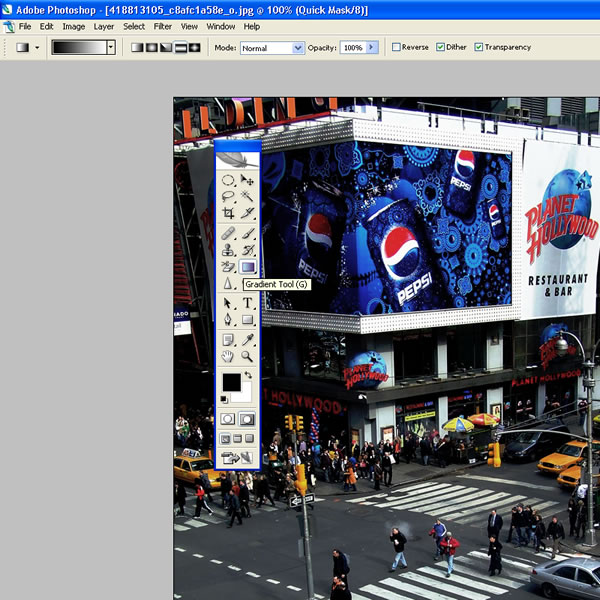
Step 3. Choose Gradient Tool

Choose the Gradient Tool by pressing G on the keyboard, or select the Gradient Tool icon. Be sure to choose the Reflected Gradient option (the fourth icon along before the Mode drop-down).
Step 3. Choose Gradient Tool

Step 4. Draw A Line

Draw a vertical line; the start point will be the centre of the in-focus area, and the end will be where the transition from in-focus to out-of-focus is completed. This step, and the subsequent two steps, will need a fair degree of trial and error. If you look closely at the image below, you will see the line has been drawn from the back door of the silver car up to just under the word Hollywood beneath the street lamp.
Step 4. Draw A Line
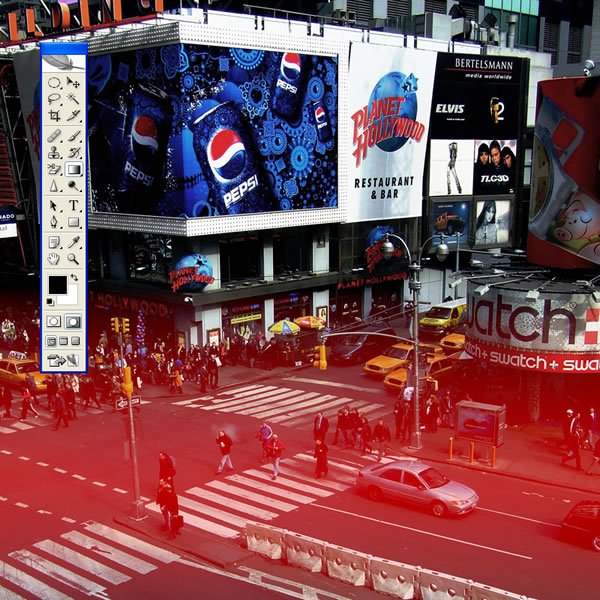
Once you release the mouse button the area of focus will appear as a red band across the image, as shown in the next step.

Step 5. View Mask Area

Before progressing, review the position of the red mask. The middle of the mask is where the in-focus area will be, gradually losing focus towards the edges. Note the out-of-focus effect is yet to be applied.
Step 5. View Mask Area

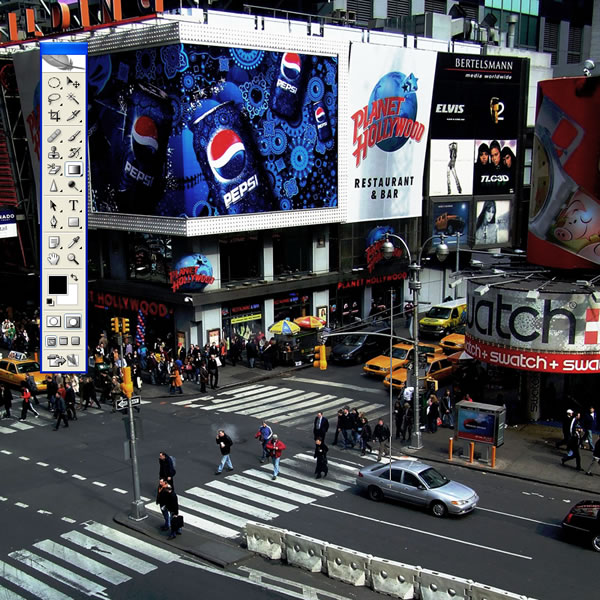
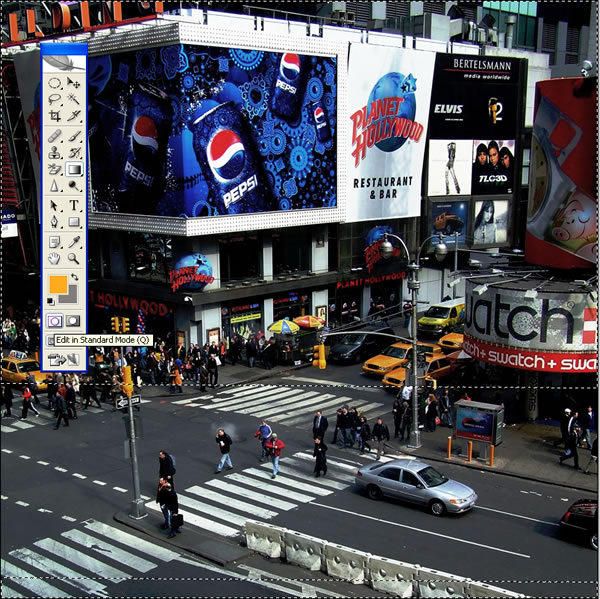
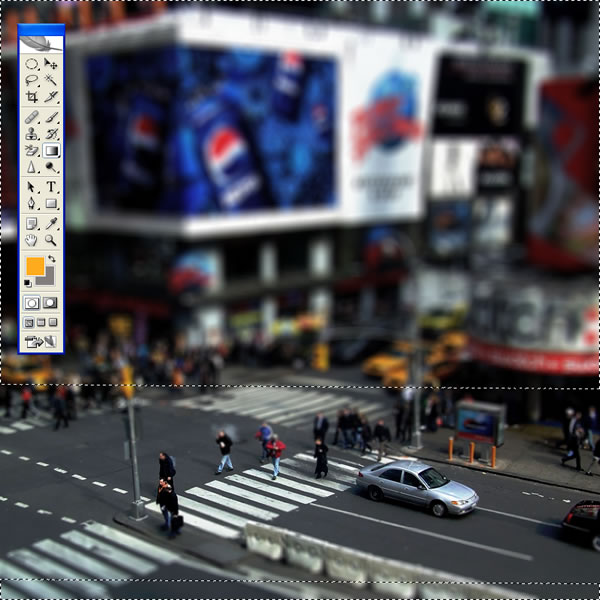
Step 6. Return To Standard Mode

Press Q on the keyboard to exit Quick Mask Mode and return to Standard Mode, or press the icon on the Tool Palette as shown below. The area to apply the focus effect to will be surrounded by the "marching ants" selection lines:
Step 6. Return To Standard Mode

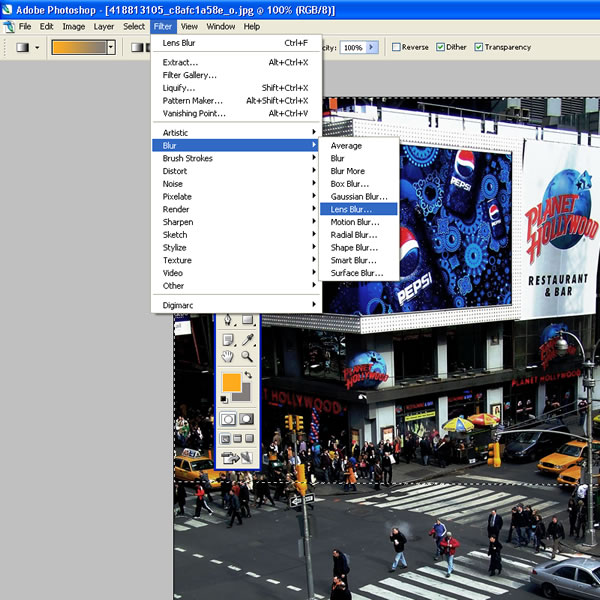
Step 7. Open Lens Blur Interface

Choose Filter > Blur > Lens Blur:
Step 7. Open Lens Blur Interface

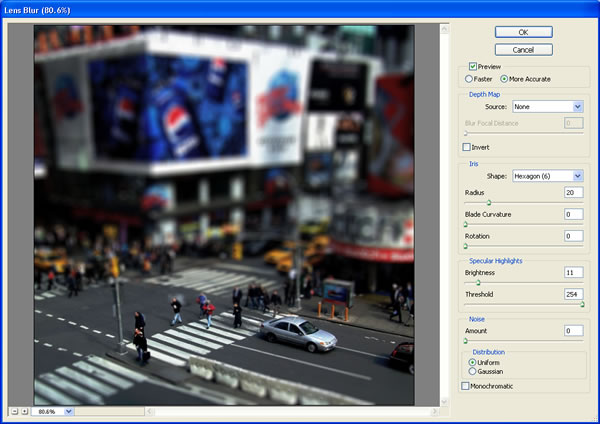
Step 8. Review Effect And Tweak Settings

Hopefully, you will now see a pleasing focus effect. The Photoshop default settings for Lens Blur seem to work well, but experiment with them to improve the effect. If you are unhappy with the position of the focus area, go back to Step 4 and try drawing a line in a different place or with a different centre of focus.
Step 8. Review Effect And Tweak Settings

Step 9. Exit Lens Blur Interface

Assuming you were happy with the image preview in Step 8, click OK to accept the settings:
Step 9. Exit Lens Blur Interface

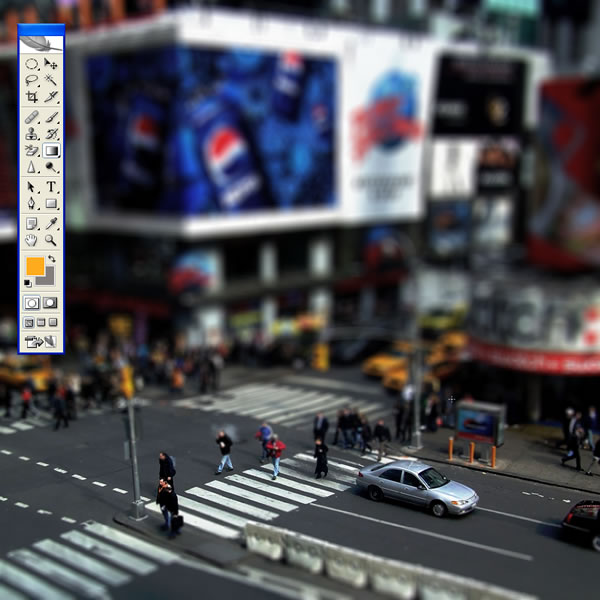
Step 10. Remove Selection Boundary

Press CTRL-D on the keyboard to remove the "marching ants" selection bounday:
Step 10. Remove Selection Boundary

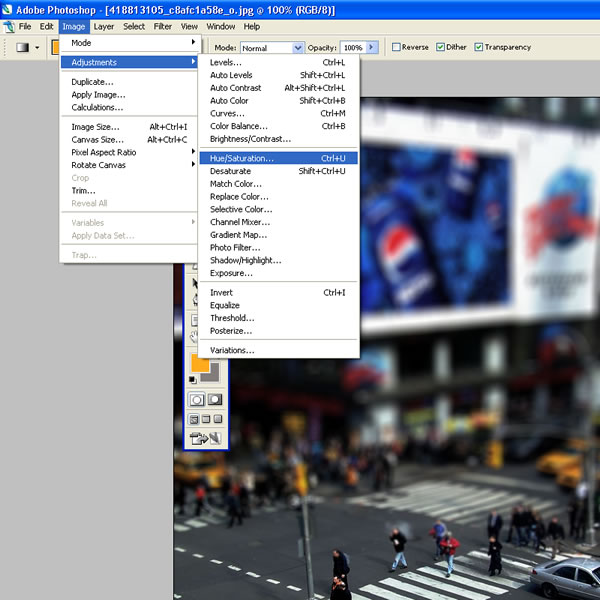
Step 11. Open Hue/Saturation Adjustment Interface

You may want to boost the colour saturation, to improve the effect. Remember that model scenery is often brightly painted so enhancing the saturation helps trick the eye. Press CTRL-U on the keyboard or select Image > Adjustments > Hue/Saturation:
Step 11. Open Saturation Adjustment Interface

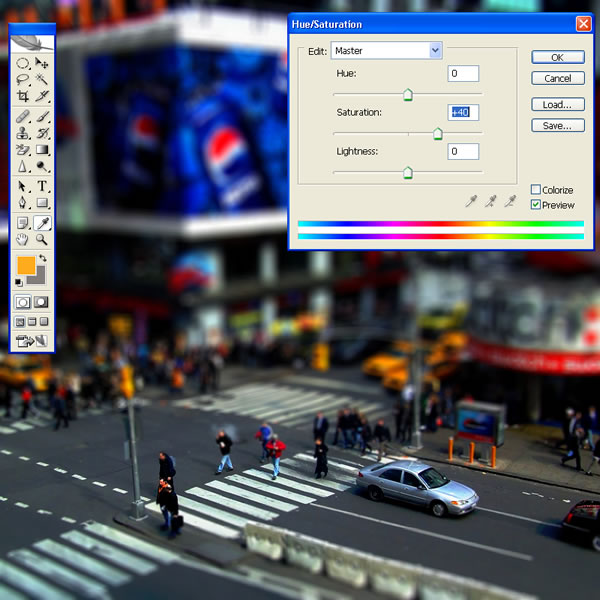
Step 12. Boost Saturation

In this example, we boost the Master saturation to +40.
Step 12. Boost Saturation

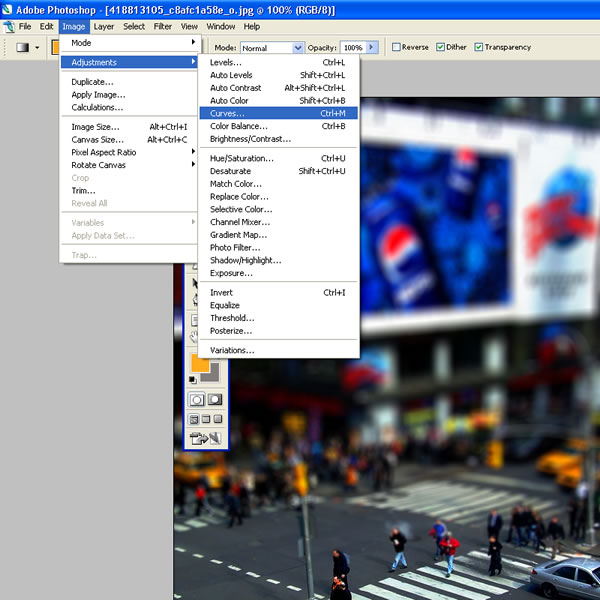
Step 13. Open Curves Adjustment Interface

It may help to increase the contrast of the image slightly using the Curves adjustment. Press CTRL-M on the keyboard or select Image > Adjustments > Curves:
Step 13. Open Curves Adjustment Interface

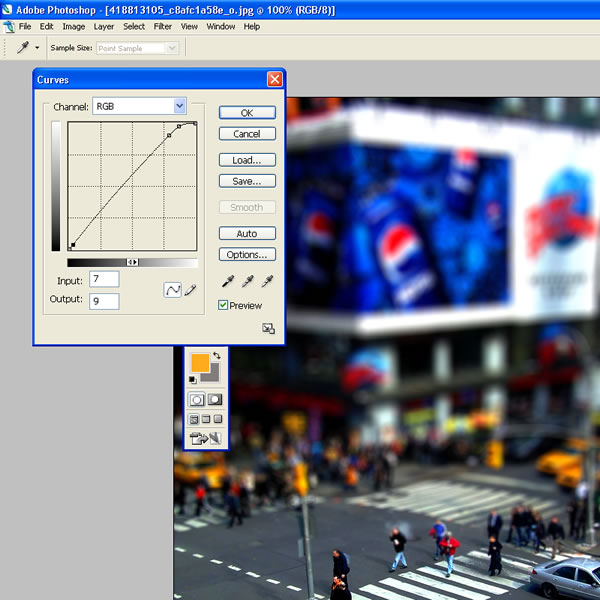
Step 14. Adjust Curves

In this example we use a very small S-shaped curve to increase contrast. Take care not to over-do this step; in fact, it may not be necessary at all.
Step 14. Adjust Curves

Step 15. Finished

Here's the finished image.
Step 15. Finished

The original image used in this tutorial is released under a Creative Commons licence by flickr member: articnomad.
 

Followers

Links

Submit your website to 20 Search Engines - FREE with ineedhits! Technology Top Blogs Bloglisting.net - The internets fastest growing blog directory Technology blogs Free web directory Technology and Web 2.0 Blogs Technology Blogs - Blog Rankings Free Link Exchange
TAMAZU: Computers Blogs

Map IP Address
Powered byIP2Location.com

Wish™ Blog Copyright © 2009 DarkfolioZ is Designed by Bie Blogger Template for Ipietoon